Tuesday, December 31, 2024

The Ultimate Kadhi Pakora Recipe: A Comforting Indian Classic

 🥘The Perfect Kadhi Pakora Recipe: A Cozy Indian Traditional Dish 🥘


Nothing compares to a bowl of kadhi pakora, a traditional North Indian meal that mixes crunchy gram flour fritters with the acidic flavors of yoghurt-based stew. This meal is a mainstay in Indian homes and is beloved by foodies for being suitable for every occasion. This recipe will walk you through each step if you want to become an expert at preparing kadhi pakora. Let's explore the specifics of this cuisine that will delight your soul.

Kadhi Pakora Recipe


Describe Kadhi Pakora.

Kadhi pakora is a delicious blend of pakoras, which are deep-fried fritters made with gram flour and spices, and kadhi, a curry prepared with yoghurt and gram flour. The crunchy pakoras and the creamy, spice-infused kadhi combine to create a pleasing harmony of flavors and textures. With its delectable taste of Indian comfort food, this kadhi pakora recipe is a must-have addition to your culinary arsenal.

Ingredients for Kadhi Pakora Recipe

To prepare this dish, you’ll need some easily available ingredients. Here’s what you’ll need:

For the Pakoras:

  • 1 cup gram flour (besan)

  • 1 medium onion, finely sliced

  • 1 green chilli, chopped

  • A handful of fresh coriander leaves, chopped

  • ½ teaspoon red chilli powder

  • ½ teaspoon turmeric powder

  • Salt to taste

  • Water, as needed

  • Oil for deep frying

For the Kadhi:

  • 2 cups yoghurt (preferably slightly sour)

  • ½ cup gram flour (besan)

  • 4 cups water

  • 1 teaspoon turmeric powder

  • 1 teaspoon red chilli powder

  • Salt to taste

For Tempering:

  • 2 tablespoons ghee or oil

  • 1 teaspoon mustard seeds

  • ½ teaspoon fenugreek seeds

  • 2 dried red chillies

  • 8-10 curry leaves

  • A pinch of asafoetida (hing)

  • 1 teaspoon cumin seeds


Step-by-Step Kadhi Pakora Recipe

Preparing the Pakoras:

Mix the batter: Put the gram flour, salt, turmeric powder, green chilli, coriander leaves, sliced onions, and green chilli powder in a bowl. Water should be added gradually to create a thick batter.

Fry the pakoras: Heat oil in a deep pan over medium heat. Using a spoon or your fingers, drop tiny amounts of the batter into the heated oil. Fry till crisp and golden brown. To drain extra oil, remove and lay on paper towels. Put aside.

Preparing the Kadhi:

To blend the yoghurt mixture, combine the yogurt and gram flour in a large bowl and whisk until smooth. Add salt, red chilli powder, and turmeric powder. While whisking, gradually add water to make sure there are no lumps.

simmer the kadhi: When the yoghurt mixture begins to boil, pour it into a deep pan and simmer it over medium heat, stirring constantly. Turn the heat down to low and simmer, stirring periodically, for 20 to 25 minutes.

Tempering the Kadhi:

  • Heat the oil or ghee in a small pan to warm the tempering spices. Add the asafoetida, cumin, fenugreek, and mustard seeds. Give them time to splutter.
  • Add the aromatics: Stir in curry leaves and dried red chilies, and cook for a few seconds until fragrant.
  • Mix the kadhi with the tempering: Over the cooking kadhi, pour this tempering and give it a good swirl.

Including the Pakoras:

  • Add the pakoras: To allow the flavors to combine, carefully add the fried pakoras to the kadhi and simmer for an additional five to ten minutes.
  • Serve hot with chapati or steamed rice after garnishing with fresh coriander leaves.


Advice for the Ideal Recipe for Kadhi Pakora

  • Make use of sour yoghurt: A little sour yoghurt adds extra flavour and tang to the kadhi.
  • Maintaining consistency is key. To get the ideal crispiness, make sure the pakora batter is thick.
  • Stir constantly: This keeps the yoghurt mixture from curdling while it's cooking.
  • Serve right away: Since the pakoras soften over time when soaked in the kadhi, it is recommended to serve the kadhi pakora fresh for the greatest experience.


Why Kadhi Pakora is a Must-Try

The kadhi pakora recipe is an experience as much as a meal. A kaleidoscope of textures is created by the dish's soft yet slightly crispy pakoras and creamy curry base. Furthermore, this straightforward dish is elevated to a gourmet level by the smoky, aromatic finish that is imparted by the tempering of mustard seeds, curry leaves, and asafoetida. Kadhi pakora is the ideal option if you want to amaze guests or find comfort on a rainy day.

Different Versions of the Kadhi Pakora Recipe

  • Spinach Pakoras: For a healthy variation, mix chopped spinach into the pakora batter.
  • Stuffed Pakoras: For a surprise, stuff the pakoras with tiny bits of paneer or potato before they're fried.
  • Rajasthani Kadhi: To achieve a deeper flavor profile, use more spices, such as cinnamon and cloves, and fewer pakoras.


Health Benefits of Kadhi Pakora

  • In addition to being a comfort food, kadhi pakora has several nutritional advantages:
  • High in protein: Yogurt in the kadhi and gram flour in the pakoras are great sources of protein.
  • Probiotic goodness: The probiotics in the yoghurt base are helpful for your gut.
  • Low gluten: Because this dish is naturally gluten-free, people who are intolerant to gluten can eat it.


In conclusion

A timeless favorite, this recipe for kadhi pakora is sure to add flavor and warmth to your dinner table. It is a recipe that appeals to people of all ages because of its straightforward components and cozy flavor. You can easily make this well-loved Indian meal in your house by following this detailed recipe. Try this recipe for kadhi pakora the next time you're craving something tasty and cozy. Your palate will appreciate it!


Kadhi Pakora Recipe


This Content Sponsored by Buymote Shopping app


BuyMote E-Shopping Application is One of the Online Shopping App

Now Available on Play Store & App Store (Buymote E-Shopping)

Click Below Link and Install Application: https://buymote.shop/links/0f5993744a9213079a6b53e8

Sponsor Content: #buymote #buymoteeshopping #buymoteonline #buymoteshopping #buymoteapplication


Monday, December 23, 2024

The Recipe for Jackfruit Milkshake: A Delicious Tropical Delight

🍹Jackfruit Milkshake Recipe: A Delightful Tropical Treat🍹


A popular tropical fruit, jackfruit is prized for its distinct texture, sweet flavor, and range of culinary uses. Making a Jackfruit Shake | Jackfruit Milkshake recipe is a refreshing way to consume jackfruit, regardless of your level of experience with this unique treat. In addition to offering advice and nutritional information, this blog will walk you through a step-by-step method to make sure your shake is incredibly creamy and delectable.

Why Pick a Shake with Jackfruit?

Jackfruit shakes are a nutritional powerhouse in addition to being a delicious treat for your taste senses. Jackfruit is a healthy shake component since it's high in antioxidants, dietary fiber, potassium, and vitamin C. The shake becomes a healthy source of calcium and protein when it is mixed with milk. This Jackfruit Shake | Jackfruit Milkshake recipe will provide you with the ideal balance of flavor and health.

Ingredients for the Perfect Jackfruit Shake

To prepare the ultimate Jackfruit Shake | Jackfruit Milkshake recipe, you’ll need the following ingredients:

  • Ripe Jackfruit Pods: 1 cup (seeds removed)

  • Chilled Milk: 2 cups (use full-fat for a creamier texture or low-fat for a lighter option)

  • Sugar or Sweetener: 2-3 tablespoons (adjust based on sweetness preference)

  • Vanilla Ice Cream or Yogurt: 1 scoop (optional for extra creaminess)

  • Ice Cubes: 4-5 (optional)

  • Cardamom Powder: A pinch (optional, for a fragrant twist)


The Best Way to Prepare a Jackfruit Shake

Anyone may follow this step-by-step recipe for Jackfruit Shake | Jackfruit Milkshake:

1. Prepare the Jackfruit

First, pick jackfruit that is sweet and ripe. Remove the yellow pods from the fruit after cutting it open. Make sure there are no fibers and discard the seeds. The sweetness and flavor of your smoothie are determined by the quality of your jackfruit, so choose aromatic and fresh pods.

2. Blend the Ingredients

In a blender, combine the jackfruit pods, cold milk, sugar (or sweetener), and a dollop of vanilla yogurt or ice cream. Blend till creamy and smooth. You can add additional ice cream or slightly less milk if you want a thicker shake.

3. Add Ice Cubes

Add a few ice cubes and blend again for ten to fifteen seconds if you want your shake cold and foamy.

4. Taste and Adjust

If necessary, alter the shake's sweetness or consistency after tasting it. Add a little milk if it's too thick, and more sugar if it's not sweet enough.

5. Serve and Garnish

For an opulent touch, top the shake with chopped jackfruit chunks, cardamom powder, or a dollop of whipped cream after pouring it into a tall glass.


Variations of the Jackfruit Shake Recipe

Its versatility is what makes the Jackfruit Shake | Jackfruit Milkshake recipe so appealing. Try the following variations:

  • Vegan Jackfruit Shake: Use almond, soy, or coconut milk in place of milk and a dairy-free ice cream substitute.
  • Protein-Packed Shake: To make this drink a post-workout meal, add a scoop of protein powder.
  • Spiced Delight: Add a dash of ginger, cinnamon, or nutmeg to boost the flavor.
  • Tropical Fusion: For a tropical twist, blend jackfruit with pineapple or mango.


Nutritional Benefits of Jackfruit Milkshake

Enjoying a Jackfruit Shake | Jackfruit Milkshake recipe is a healthful and fulfilling treat. Here is a brief summary of its advantages:

  • Packed with Antioxidants: Antioxidants found in jackfruit help combat free radicals, enhancing skin health and lowering inflammation.
  • Boosts Immunity: A strong immune system is supported by the high vitamin C content.
  • Helps Digestion: Jackfruit's dietary fiber contributes to intestinal health.
  • Energy Booster: This drink is perfect for hectic mornings or recuperating after a workout because it contains natural sugars that give you a quick energy boost.
  • Bone Health: Milk's calcium and potassium help build stronger teeth and bones.

Tips for the Best Jackfruit Milkshake

  • Use Fresh Jackfruit: The finest flavor and aroma come from using fresh jackfruit. If canned jackfruit isn't available, use it, but make sure it's preserved in natural syrup rather than sweet syrup.
  • Adjust Sweetness: To prevent over sweetening, taste the jackfruit before adding sugar because it is inherently sweet.
  • Serve Right Away: Serve the shake cold and fresh for the finest flavor and texture.
  • Try Different Toppings: Chocolate chips, shredded coconut, or crushed nuts can make your shake even better.


The Cultural Significance of Jackfruit

In many tropical cultures, jackfruit has a unique place. Jackfruit is prized for its ability to be used in a variety of savory and sweet recipes in nations like Thailand, Sri Lanka, and India. Modern recipes like this Jackfruit Shake | Jackfruit Milkshake recipe combine traditional flavors with the latest culinary trends by including jackfruit.

In conclusion

Enjoy the tropical charm of jackfruit in a delicious way with this recipe for Jackfruit Shake | Jackfruit Milkshake. This beverage is nutrient-dense in addition to being delicious. This shake is perfect if you're searching for a cool drink, a quick breakfast choice, or a special treat to wow guests. Give it a try now and allow the delicious fruitiness to take you to a tropical paradise!

Jackfruit Milkshake


Commonly Asked Questions


1. Can I put the Jackfruit Shake in the fridge to use later?


The shake should ideally be consumed right away after making it. You can, however, keep it in the refrigerator for up to 24 hours. Before serving, give it a good shake.


2. Is a blender necessary to make this recipe?

You can physically mash the jackfruit and combine it with milk, though a blender is the best option. It's still delicious even though the texture won't be as smooth.


3. What goes nicely with a shake made with jackfruit?

Light appetizers like sandwiches, biscuits, or tropical fruit salads go really well with this drink.


This Content Sponsored by Buymote Shopping app

BuyMote E-Shopping Application is One of the Online Shopping App

Now Available on Play Store & App Store (Buymote E-Shopping)

Click Below Link and Install Application: https://buymote.shop/links/0f5993744a9213079a6b53e8

Sponsor Content: #buymote #buymoteeshopping #buymoteonline #buymoteshopping #buymoteapplication


Monday, December 16, 2024

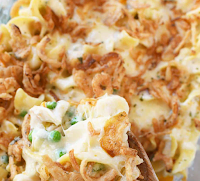
One-Pan Tuna Noodle Casserole Recipe: The Ultimate Comfort Food for Busy Days

 😋The Perfect Comfort Food for Busy Days: A One-Pan Tuna Noodle Casserole Recipe😋

A cuisine that is pleasantly delicious, simple to prepare, and requires little cleanup has a certain allure. A timeless comfort food that has endured over time is the One-Pan Tuna Noodle Casserole recipe. For hectic weeknights when you want a filling dinner without spending hours in the kitchen, this dish is ideal. From ingredients to variations and hints for excellence, we'll walk you through every step of creating the best One-Pan Tuna Noodle Casserole recipe in this article.

A Brief History of Tuna Noodle Casserole

Home cooking in the middle of the 20th century is where the One-Pan Tuna Noodle Casserole recipe originated. Because of its price and ease of use, it gained popularity in the 1950s and became a mainstay in kitchens across the United States and Britain. Pasta, condensed soup, and canned tuna were all readily available and shelf-stable items in the original recipe.This traditional meal has undergone numerous changes to accommodate contemporary palates. Nevertheless, its reassuring quality endures, making it a cherished dish that appeals to all age groups.

Why the One-Pan Tuna Noodle Casserole Recipe is a Winner

For good reason, the One-Pan Tuna Noodle Casserole recipe is a mainstay. It is made using a single pan and includes protein-rich tuna, soft noodles, creamy sauce, and a crunchy garnish. This makes cleanup a breeze in addition to simplifying the cooking process. This recipe is a favorite with families and people alike because it is simple and forgiving, regardless of your level of culinary skill.

Ingredients You’ll Need for the One-Pan Tuna Noodle Casserole Recipe

Here’s what you’ll need to whip up this crowd-pleaser:

  • 200g egg noodles or any pasta of your choice
  • 2 cans of tuna (in water, drained)
  • 1 can of cream of mushroom soup (for the classic flavour)
  • 1 cup milk or a non-dairy alternative
  • 2 cups chicken or vegetable stock
  • 1 medium onion, finely diced
  • 2 garlic cloves, minced
  • 1 cup frozen peas (optional but recommended)
  • 1 teaspoon dried thyme
  • ½ teaspoon paprika
  • Salt and pepper to taste
  • 1 cup shredded cheddar cheese
  • ½ cup breadcrumbs (for a crunchy topping)
  • 2 tablespoons olive oil or butter

These pantry staples make the One-Pan Tuna Noodle Casserole recipe not only easy to prepare but also budget-friendly.

How to Prepare the Recipe for One-Pan Tuna Noodle Casserole

This step-by-step guide ensures your One-Pan Tuna Noodle Casserole recipe turns out perfect every time:

Step 1: Prep Your Pan

In a large ovenproof skillet, heat the butter or olive oil over medium heat. Add the chopped onion and cook for about three minutes, or until it is tender. Add the minced garlic and sauté until fragrant, about 1 minute more.

Step 2: Construct the Creamy Foundation

Add the milk, chicken or vegetable stock, and cream of mushroom soup to the pan. Make sure the mixture is smooth by stirring to combine. Add salt, pepper, paprika, and thyme for seasoning. Heat the mixture until it simmers gently.

Step 3: Prepare the noodles.

Make sure the noodles are well immersed in the creamy sauce by adding them straight to the pan. To avoid sticking, stir from time to time. Noodles should be soft but still slightly firm after 8 to 10 minutes of cooking.

Step 4: Add the peas and tuna.

After the noodles are cooked, add the frozen peas and drained tuna and fold gently. While the peas provide the meal a burst of color and sweetness, this step guarantees that the tuna stays intact.

Step 5: Sprinkle breadcrumbs and cheese over top.

Evenly distribute the cheddar cheese shreds on top of the casserole. Scatter breadcrumbs over the cheese for the ideal crispy garnish. For added golden crispiness, you can also brush the breadcrumbs with a little melted butter.

Step 6: Grill or Bake

Transfer the pan to the oven and preheat the broiler or grill. The breadcrumbs should be golden brown and the cheese should be bubbling after 5 to 7 minutes on the grill.

Step 7: Present and Savor!

Before serving, let the dish rest for a few minutes. For a full supper, serve it with steamed veggies or a simple green salad.

Why Busy Lives Are Ideal for the One-Pan Tuna Noodle Casserole Recipe

The effectiveness of the One-Pan Tuna Noodle Casserole recipe is one of its main benefits. You can save time on preparation and cleanup by cooking everything in a single pan. Additionally, you may utilize ingredients you already have in your cupboard because the recipe is so flexible.

This dish is also perfect for meal planning. It's a great choice for weekday lunches or quick dinners because it reheats well. Just keep leftovers in the refrigerator for up to three days in an airtight container.


Modifying the Recipe for Tuna Noodle Casserole in One Pan

The One-Pan Tuna Noodle Casserole dish is so adaptable that it's simple to modify to suit your dietary requirements and preferences. Here are some suggestions to personalize it:

  • Change the Protein: Cooked salmon, turkey, or chicken can be used in place of tuna.
  • Boost the Veggies: To add more nutrition, add sliced carrots, spinach, or mushrooms.
  • Try Different Cheeses: Consider Parmesan, mozzarella, or even a hot cheese like pepper jack.
  • Make it gluten-free by using breadcrumbs and noodles that are gluten-free.
  • Add Herbs and Spices: You can enhance the flavors by adding fresh parsley, dill, or a little chilli flakes.

Nutritional Benefits of the One-Pan Tuna Noodle Casserole Recipe

In addition to being nourishing, the One-Pan Tuna Noodle Casserole recipe is comforting. Here's why it's a wise decision:

  • Protein-Rich: Lean protein, which is necessary for both muscle growth and repair, is found in tuna.
  • Heart-Healthy: Omega-3 fatty acids, which are abundant in tuna, promote heart health.
  • Carbohydrates Packed with Energy: The noodles give you steady energy.
  • Vitamin-Boost: The addition of peas and other vegetables adds fiber and vitamins to the meal.

Tips for Perfecting the One-Pan Recipe for Tuna Noodle Casserole

  • You can avoid the trouble of moving the dish to a different baking dish by using an oven-safe pan.
  • Avoid overcooking the noodles since they will absorb the creamy sauce while baking if they are just a little undercooked.
  • Don't be afraid to use herbs and spices because tuna and noodles can be light.
  • Prepare Ahead: The casserole can be put together a day ahead of time and baked when it's ready.

In conclusion

For good reason, the One-Pan Tuna Noodle Casserole recipe is a classic. It's a great addition to your weekly dinner rotation because it's quick, simple, and incredibly customizable. This recipe is likely to gratify anyone who enjoys a nice comfort food, be it a parent balancing several duties or a busy professional.
Try it and see how the cheesy, creamy richness warms your table. You'll have a tasty supper that's as much fun to prepare as it is to consume with the One-Pan Tuna Noodle Casserole recipe!


This Content Sponsored by Buymote Shopping app

BuyMote E-Shopping Application is One of the Online Shopping App

Now Available on Play Store & App Store (Buymote E-Shopping)

Click Below Link and Install Application: https://buymote.shop/links/0f5993744a9213079a6b53e8

Sponsor Content: #buymote #buymoteeshopping #buymoteonline #buymoteshopping #buymoteapplication


Tuesday, December 10, 2024

Yummy Palak Corn Recipe: A Nutritious Vegetarian Treat

 Delicious Palak Corn Recipe: A Wholesome Vegetarian Delight

Are you in the mood for something flavorful, wholesome, and simple to prepare? You need look no farther than the traditional recipe for Palak corn! This colorful dish is a nutritious yet delicious choice for lunch or dinner since it blends the sweetness of maize with the goodness of spinach (palak). It's the perfect option for anyone wishing to increase their intake of greens because it's full of vital vitamins and minerals. We'll show you how to make the ideal Palak Corn dish in this blog, so you can always count on a tasty, nutrient-dense dinner.


What Makes Palak Corn the Best Option?

Spinach and corn are two very nutrient-dense foods that come together perfectly in the Palak Corn dish. Corn is a wonderful source of fiber, vitamin B6, and magnesium, while spinach is high in iron, vitamins A and C, and antioxidants. When combined, they produce a nutritious balance that promotes your well-being and makes for a tasty dinner. The Palak Corn recipe is a great option if you're searching for a quick and healthy vegetarian meal that's also satisfying!

Ingredients for the Perfect Palak Corn Recipe

Before we dive into the cooking steps, let’s take a quick look at the ingredients you'll need to make the Palak Corn recipe:

  • 2 cups of fresh spinach leaves (palak)
  • 1 cup of sweet corn kernels (fresh or frozen)
  • 1 medium-sized onion, finely chopped
  • 1-2 green chilies, chopped (optional)
  • 1 tablespoon of ginger-garlic paste
  • 1 teaspoon of cumin seeds
  • 1 teaspoon of turmeric powder
  • 1 teaspoon of garam masala
  • Salt to taste
  • 1 tablespoon of oil or ghee
  • Fresh coriander leaves for garnish
  • Water as required

These simple ingredients are likely already in your pantry or local grocery store, making it easy to whip up a wholesome Palak Corn recipe whenever you want a quick and satisfying meal.

How to Make Palak Corn: A Step-by-Step Guide

Step 1: Get the spinach (palak) ready

To begin, thoroughly wash the spinach leaves to get rid of any dirt or contaminants. After cleaning, blanch the spinach for two to three minutes in hot water to make it softer. To maintain the spinach's nutrients and vivid green color, quickly submerge it in cold water after blanching. Drain the water when the spinach has cooled, then chop it finely or puree it until it's smooth, whatever you like.

Step 2: Corn Cooking

Take the kernels off the cob and steam them if you're using fresh corn. You just need to defrost the frozen corn before using it. The corn should be soft but not mushy in either case. This will contribute to the delightful texture of the Palak Corn dish.

Step 3: Aromatic Sautéing

In a pan, heat a tablespoon of oil or ghee. Let the cumin seeds sizzle after adding them. After that, add the chopped onions and cook till golden brown. This will highlight the onions' inherent sweetness, which accentuates the spinach's earthiness.
Then, if using, add the green chiles and ginger-garlic paste, and cook until the raw scent goes away. This gives the dish a deep flavor and forms the aromatic foundation of the Palak Corn recipe.

Step 4: Add some spiciness

The turmeric powder and garam masala should be added after the onions and spices have cooked thoroughly. Allow the spices to release their flavors and infuse into the oil by stirring the mixture until it is well combined. Garam masala provides the dish its distinctive warmth and depth of flavor, while turmeric gives the Palak Corn recipe a lovely color and anti-inflammatory qualities.

Step 5: Include the corn and spinach

The cooked corn kernels and spinach puree (or chopped spinach) should now be added to the pan. Make sure the corn and spinach are evenly covered with the spices by completely mixing everything together. Allow the flavors to combine by cooking for a few minutes.
To get the right consistency, you can add a little water if the mixture seems too thick. Allow the meal to cook through and the flavors to meld by letting it simmer for five to seven minutes.

Step 6: Final Touches

Make any necessary adjustments to the salt after tasting your perfectly cooked Palak Corn dish. Add some color and a burst of freshness by garnishing with fresh coriander leaves. Serve your creation hot alongside rice or chapati, or even as an accompaniment to a major course.

Tips to Elevate Your Palak Corn Recipe

  • Spice Level: Adapt the degree of heat to your personal taste. The quantity of green chilies can be changed, and for an added spice, you can add red chili powder.
  • Creamy Version: Toward the end of cooking, you can add a tablespoon of cream or cashew paste for a richer texture. This will add a creamy texture to your recipe for Palak Corn
  • .Chickpeas or Tofu: Try combining cooked chickpeas or cubes of tofu with the corn if you want to up the protein content of the dish. Your Palak Corn recipe will become even more satisfying as a result.
  • Frozen Palak: You can use frozen spinach if fresh spinach isn't available. Before adding it to the pan, just make sure to defrost it and squeeze off any extra water.


The Health Advantages of Palak Corn

In addition to being delicious, the Palak Corn dish has several health advantages. This dish should be a regular component of your diet for the following reasons:

  • Rich in Iron: The high iron content of spinach is well-known for avoiding anemia and supporting normal blood circulation.
  • Enhances Immunity: Vitamins A and C, which are essential for enhancing immunity and preserving good skin, are abundant in both spinach and maize.
  • Supports Digestive Health: The fiber in maize and spinach helps with digestion, preventing constipation and fostering gut health.
  • Heart Health: The anti-inflammatory qualities of corn and the antioxidants in spinach help to preserve heart health.
  • Weight management: This nutrient-dense, low-calorie meal is a fantastic choice for anyone trying to control their weight because it keeps you feeling fuller for longer.

Reheating and Storage

You can keep the palak corn recipe in the fridge for up to two days if you store it in an airtight container. To return it to its original consistency, reheat it in the microwave or on the stovetop with a little water added.
Do not add cream while cooking if you are making this recipe ahead of time. To preserve flavor and freshness, stir it in right before serving.

Conclusion

The palak corn dish combines simplicity, flavor, and health in a fascinating way. It appeals to people of all ages because of its balanced flavors, creamy texture, and vivid colors. This dish is sure to please whether you're cooking for a midweek meal or throwing a dinner party.
It's important to explore and add your own unique touch when cooking, so feel free to modify this recipe to your taste. You can have a guilt-free pleasure that meets your nutritional demands and palate with the palak corn dish.
Now get your ingredients together, get your hands dirty, and make this healthy cuisine in your home. Have fun in the kitchen!


This Content Sponsored by Buymote Shopping app

BuyMote E-Shopping Application is One of the Online Shopping App

Now Available on Play Store & App Store (Buymote E-Shopping)

Click Below Link and Install Application: https://buymote.shop/links/0f5993744a9213079a6b53e8

Sponsor Content: #buymote #buymoteeshopping #buymoteonline #buymoteshopping #buymoteapplication

Tuesday, December 3, 2024

Cabbage Parmesan Recipe: A Unique Twist on a Classic Dish

 How to Make Cabbage Parmesan: A Novel Take on a Traditional Recipe

A vegetable that is frequently overlooked, cabbage can steal the show when cooked properly. You've come to the right spot if you're searching for a nice and unusual way to eat this common vegetable. We will share with you a recipe for cabbage parmesan in this blog article, which is likely to become a family favorite. It is a healthier substitute for classic Parmesan recipes and is flavorful and straightforward. Now let's explore how to prepare this delicious dinner at home!

What Is Cabbage Parmesan?

An inventive take on the traditional eggplant parmesan is cabbage parmesan. We're using cabbage as the basis instead of eggplant, making it a healthier and lighter choice. The marinara sauce, mozzarella, and grated Parmesan cheese are added to the delicately roasted or fried cabbage before it is baked to perfection. The end product is a dish that blends the freshness of cabbage with the richness of Parmesan, and it is crispy, cheesy, and fulfilling.
This recipe for cabbage parmesan is the ideal choice whether you're a cabbage lover or trying to find a way to eat more veggies.

Why Choose Cabbage for This Recipe?

A vegetable that is very adaptable and full of health advantages is cabbage. It is a great option for a nutritious lunch because it is abundant in fiber, vitamins C and K, and antioxidants. Cabbages are also low in calories, which makes them a perfect choice for anyone who want to keep their diet balanced.
The mild flavor and pleasing texture of the cabbage in this dish for cabbage parmesan go well with the creamy cheeses and the tart marinara sauce. This recipe is sure to alter your perspective on cabbage, regardless of your level of familiarity with it.

Ingredients for the Perfect Cabbage Parmesan Recipe

To create this flavour-packed dish, you'll need:

  • 1 medium head of green or savoy cabbage
  • 2 cups of marinara sauce (store-bought or homemade)
  • 200g of grated parmesan cheese
  • 200g of mozzarella cheese, shredded
  • 1 cup of breadcrumbs (preferably panko for extra crunch)
  • 2 tbsp of olive oil
  • 2 garlic cloves, minced
  • 1 tsp of dried oregano
  • 1 tsp of dried basil
  • Salt and freshly ground black pepper to taste
  • Fresh parsley for garnish

By using simple, pantry-staple ingredients, this cabbage parmesan recipe is easy to prepare without a last-minute dash to the shops.


Step-by-Step Guide to Making Cabbage Parmesan

Step 1: Preparing the Cabbage

Preheat your oven to 190°C (375°F) to begin. Slice the cabbage into thick wedges, retaining the center to keep the layers together, after removing any tough outer leaves. The cabbage wedges should be somewhat soft but still firm after 5 to 7 minutes of boiling in salted water. After thorough draining, set away.


Step 2: Making the Tomato Sauce

You can omit this step if you're using store-bought marinara sauce. However, sauté minced garlic in olive oil until aromatic for a bright and fresh touch. Add the basil, oregano, salt, pepper, and canned crushed tomatoes. Simmer for 15 minutes, stirring now and again, to make a rich foundation for your recipe for cabbage parmesan.

Step 3: Assembling the Dish

Spread a thin layer of tomato sauce in a large baking dish. Place the cabbage wedges on top, overlapping them just a little bit if needed. Make sure to coat every piece of cabbage with tomato sauce by spooning extra over it. Cover the sauce with a thick layer of mozzarella and then parmesan cheese.


Step 4: Adding the Crunch

Add the breadcrumbs, chopped parsley, a pinch of salt, and a spray of olive oil. Over the cheese layer, scatter the breadcrumb mixture. The cabbage parmesan recipe gains a lovely texture from this crispy topping.

Step 5: Perfectly Baked

After preheating the oven, bake the dish for 20 to 25 minutes, or until the cheese is golden brown and bubbling. Before serving, let the dish cool for a few minutes. If preferred, garnish with additional fresh parsley.


Serving Ideas with Parmesan Cabbage

Although this recipe for cabbage parmesan is substantial enough to serve as a main course, it also makes a wonderful accompaniment. Think about serving it with:

  • To lap up the delectable tomato sauce, use crusty garlic bread.
  • To counterbalance the richness, a crisp green salad with a zesty vinaigrette
  • For a heartier supper, try light spaghetti or roasted potatoes.

This recipe's adaptability makes it suitable for both entertaining guests and having a family dinner.

Tips and Tricks for the Best Cabbage Parmesan Recipe

Select the Correct Cabbage:

 Savoy cabbage offers a beautiful texture and a touch of sweetness, but green cabbage also works well.

Avoid Overcooking the Cabbage: 

By boiling the cabbage just until it is soft, you can make sure that it will keep its structure when baked.

Personalize the Cheese: 

Although mozzarella and parmesan are traditional, you can choose gruyere or cheddar for a different take.

Make It Ahead: 

This meal is ideal for hectic schedules because it can be prepared a day ahead of time and cooked when needed.

Add Protein: 

To make the tomato sauce heartier, add cooked minced beef or shredded chicken.

A Delicious and Nutritious Substitute

This cabbage parmesan recipe is healthier than classic parmesan recipes since it has fewer calories and carbs. It is also appropriate for vegetarians and may be modified for vegans with a few changes (such using cheese without dairy).
This dish is a unique addition to any menu because of its layers of flavors and textures. The creamy cheese and rich, savory tomato sauce go well with the soft cabbage, demonstrating how basic items can be used to make amazing dishes.

The Appeal of Reinventing Comfort Food

Taking a well-known idea and giving it a new spin has a unique quality. The recipe for cabbage parmesan is a great example of how culinary innovation can give traditional foods a fresh twist. It serves as a reminder that, with the correct preparation, even the most basic materials may shine.

Final Remarks

This cabbage parmesan recipe is the solution if you're trying to make cabbage the main attraction instead of just a supporting character. It's a recipe you'll make again and again because it's simple to prepare, quite gratifying, and appropriate for any occasion.
Therefore, why not try it? Get your ingredients together, fire up the oven, and watch as this wholesome and delectable recipe takes over your dinner table this evening.
Please share your experience with the cabbage parmesan recipe in the comments section below. Your tweaks and serving suggestions would be much appreciated!


This Content Sponsored by Buymote Shopping app

BuyMote E-Shopping Application is One of the Online Shopping App

Now Available on Play Store & App Store (Buymote E-Shopping)

Click Below Link and Install Application: https://buymote.shop/links/0f5993744a9213079a6b53e8

Sponsor Content: #buymote #buymoteeshopping #buymoteonline #buymoteshopping #buymoteapplication


Discover the Authentic Taste of Asia with This Irresistibly Flaky and Creamy Hong Kong Egg Tarts Recipe You’ll Love Baking

 The Ideal Recipe for Hong Kong Egg Tarts: A Delectable Exploration into Asian Pastry Culture The smell of freshly made pastries probably at...